Kitchen Reno – THE NEW BEGINNING
It’s been almost 4 years since I first shared with you that we are wanting to renovate our kitchen. It always seemed like a big task to tackle and given both of us are “self-employed” the idea of finding time to take on such a project looked pretty unlikely. But, there’s nothing like a global pandemic to shut everything down and give us the time we needed to even start the renovation. Finding ourselves time rich is one thing, but the trouble with a pandemic is that it also makes you income poor. The only way this kitchen was going to get remade was by finding some serious ways to trim down the budget.
So we had a major rethink on the project, and started with a clean slate. Again. In the 4 years leading up to this moment we had redesigned the kitchen a few times. There was even a fleeting moment of having the cupboards in a peacock green colour, with a heat lamp like chefs use in restaurants. Our final design ended up very similar to the one we shared in the first blog post, all those years ago, with simple lines and a bigger island. Most kitchens have waaaaay too little bench space.
Turning The Page
Instead of immersing ourselves in sub-zero Arctic conditions this year, we’re enjoying a stunningly beautiful La Nina summer in Melbourne. It’s mostly not too hot, with lots of blue skies and sunshine. The end of 2020 was marked by getting our Cabin Fever Cookbook out into the world. Welcoming in 2021 was very much about turning a new page for both myself and my husband, and making the most of a difficult year behind us and likely another tough one ahead. On New Years Eve we found ourselves clicking online through the post-Christmas sales, and realising we can save a few dollars on essential kitchen hardware.
4 hours before the sale ended on New Years Eve we had picked out a stove, rangehood, sink and tapware and popped in our order. The deal was done and now we had to get organised. The stove and sink would not be available for 5 weeks, which suited us fine as we could get to work on the demolition of the old kitchen and preparation of the new kitchen. We had a rough idea what needed to be done, and a rough idea of how much learning was ahead of us. The key is to take everything slow and not to rush it. Mistakes will happen, but give yourself time to roll them back and don’t worry if you fall behind a day or two here and there.
Do It Yourself
These words are both exciting and terrifying. What if we can’t do it ourselves and everything ends up a big hot mess? We decided to start small, by updating the bathroom vanity. Turns out we had bought a nice basin and taps for that about 4 years too, and then left the box gathering dust. With an intense couple of days work we soon had our new vanity and basin in place, and a critical but of confidence to step forward with the kitchen.
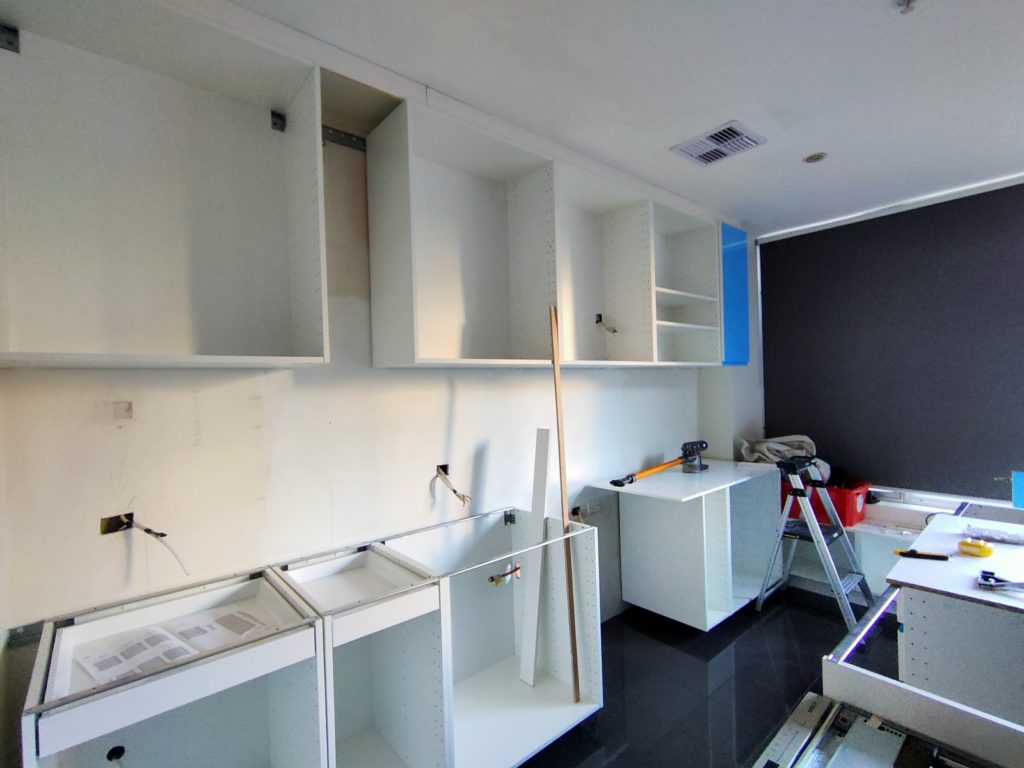
We chose IKEA for the kitchen cabinets. Having used their systems for the bathroom and laundry, we were familiar with the pros and cons they present. The range of options you can work inside a cabinet is seriously impressive with IKEA. Choice of quality drawer hardware, organisational inserts and even a range of trash bins for recycling. The cabinets are good, but what you can put into them is even better.
My husband was a fan of the cabinet system too because it’s based on installing a mounting rail on the wall first. If you get the rail right, most everything follows. That’s what we found too, that everything took shape remarkably well. The occasional wonky moment with the screw-driver needed attention, but mostly we got the timber straight. If you think you have the skills to rip out your old kitchen cabinets then you likely have the skills to install new IKEA ones too.
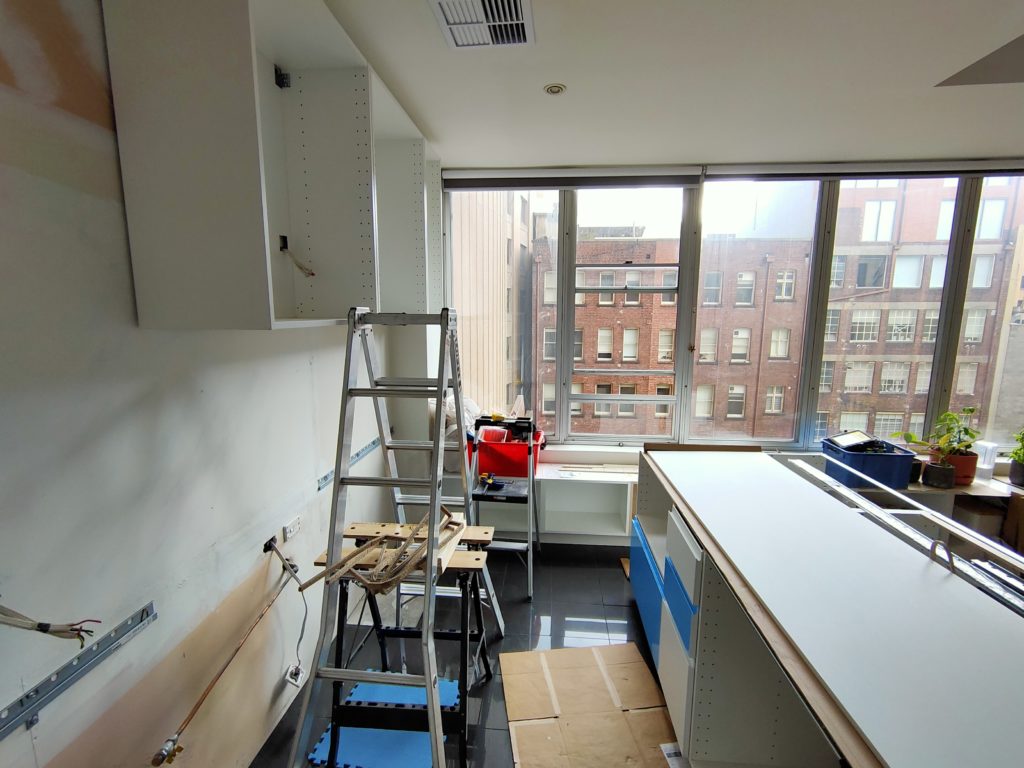
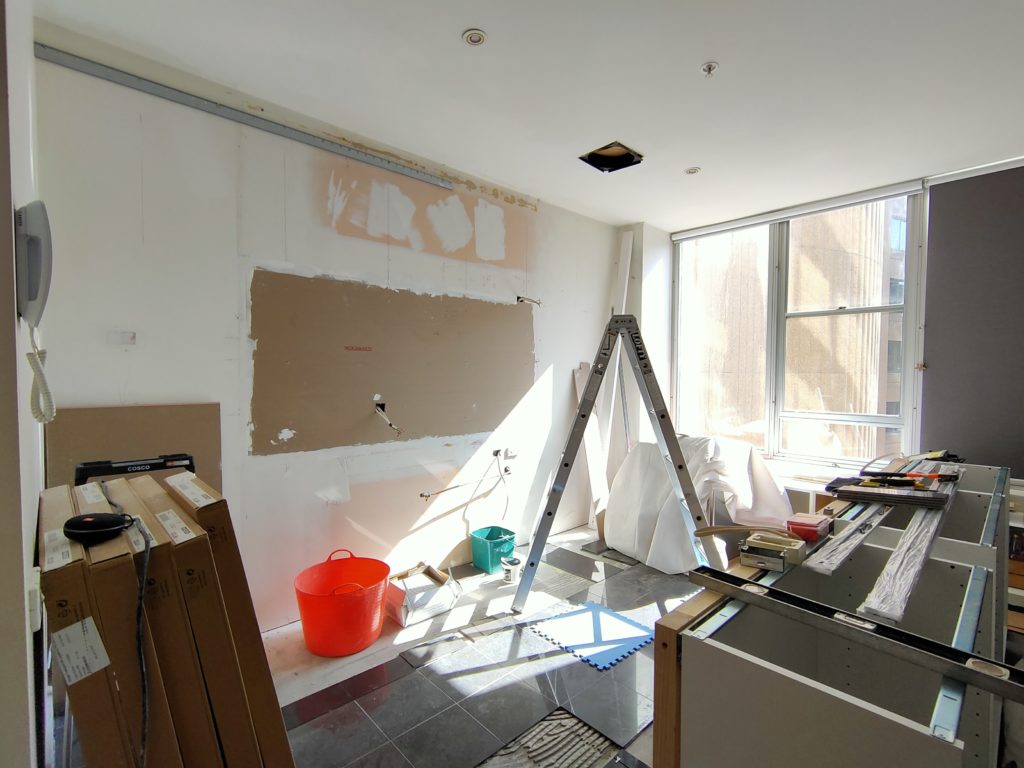
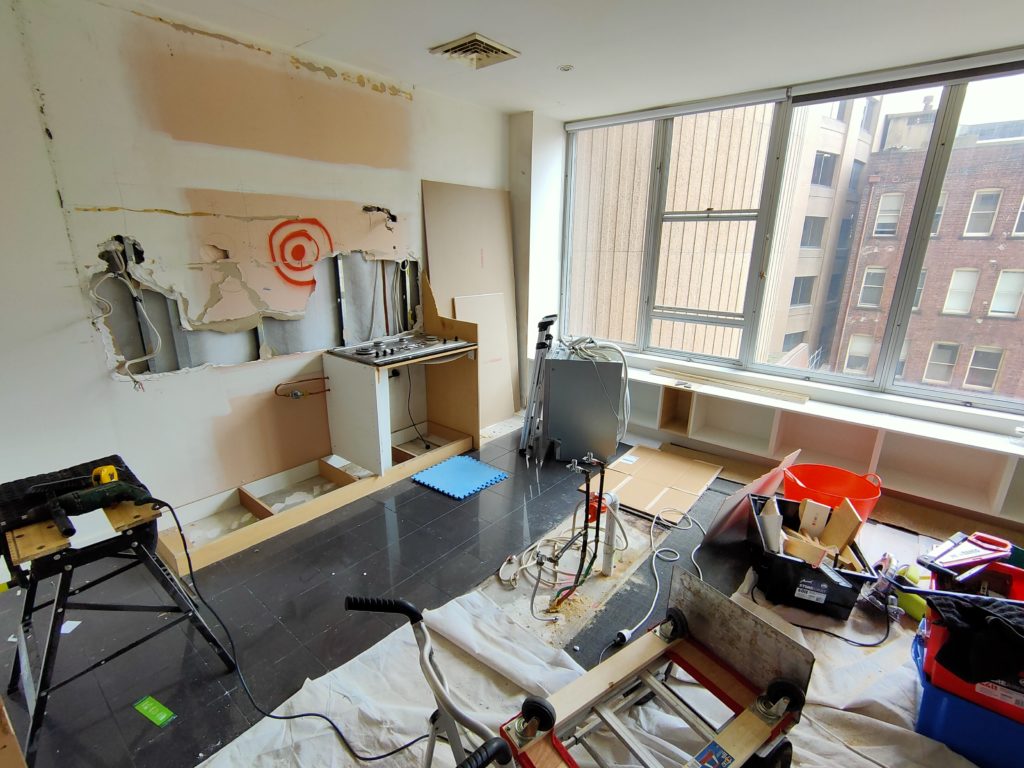
The hard parts are when plumbing isn’t where you wanted it, or when the old splashback was glued on with liquid nails and tears away half a wall of gyprock to remove. We accepted the apartment was going to be a mess for a while, and we did not disappoint.
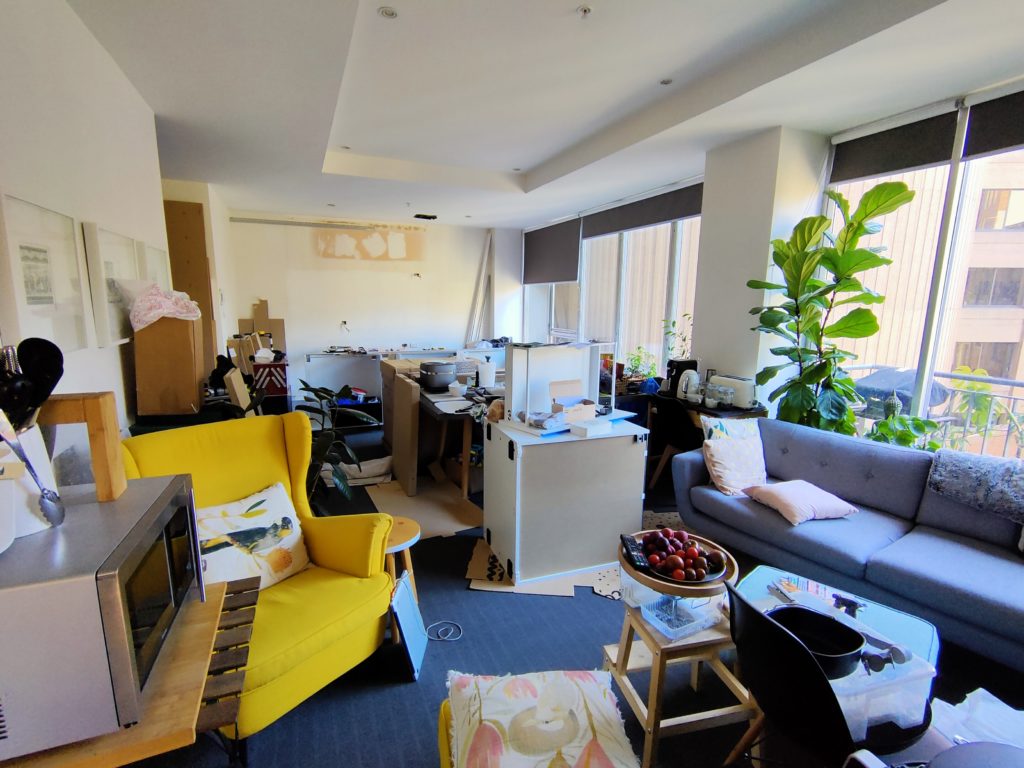
Lounge Kitchen
Our home is not huge, so turning the kitchen into a construction zone had a significant impact on our living space. Everything that was previously stored in the cabinet shelves was now either packed away in the store room, or jammed into the living room. We had an air-fryer and a hotplate for meals, and the laundry sink was now our main washing up facility. Things were a bit of a juggle, as the same extension cord that gets used for power drills and table-saws has to be commandeered at meal times to sandwich press or microwave. Just leaving space to walk from the lounge to the bedroom was like a game of Tetris.
Clicks and Mortar
The hardest part of building a kitchen with IKEA is their online design tool. A decades ago it was probably pretty cool, but it’s starting to show its age now. Immense skill is required to wrangle the software to create what you need. It’s slow, frustrating, cumbersome and can quickly kill your inspiration for design. Patience, practice and perseverance are required. We had a Zoom meeting with one of the IKEA kitchen specialists who took our design and applied a bit of quality control to it. This means we end up with all the right pieces and a lot fewer surprises.
Four years ago we had a “kitchen expert” from another kitchen supplier come in and draw up a design, and they priced the cabinets at just under $38,000 not including installation, trades, appliances or benchtops. That was a shock. This time the cabinets came in at just over $6,000 inclusive of soft-close everything and a massive amount of drawers.
We mostly have great things to say about IKEA and the cabinets. The delivery guys maybe need to go back for more training, after overloading their trolley and crashing half of our flat-packs all over the pavement. We didn’t realise how much damage they had done until we got into the installation. Mostly we could avoid the bashed bits from being visible. On the flip side, I visited the spare-parts team at IKEA and they gave me lots of odds and extras at no charge.
Custom Extras
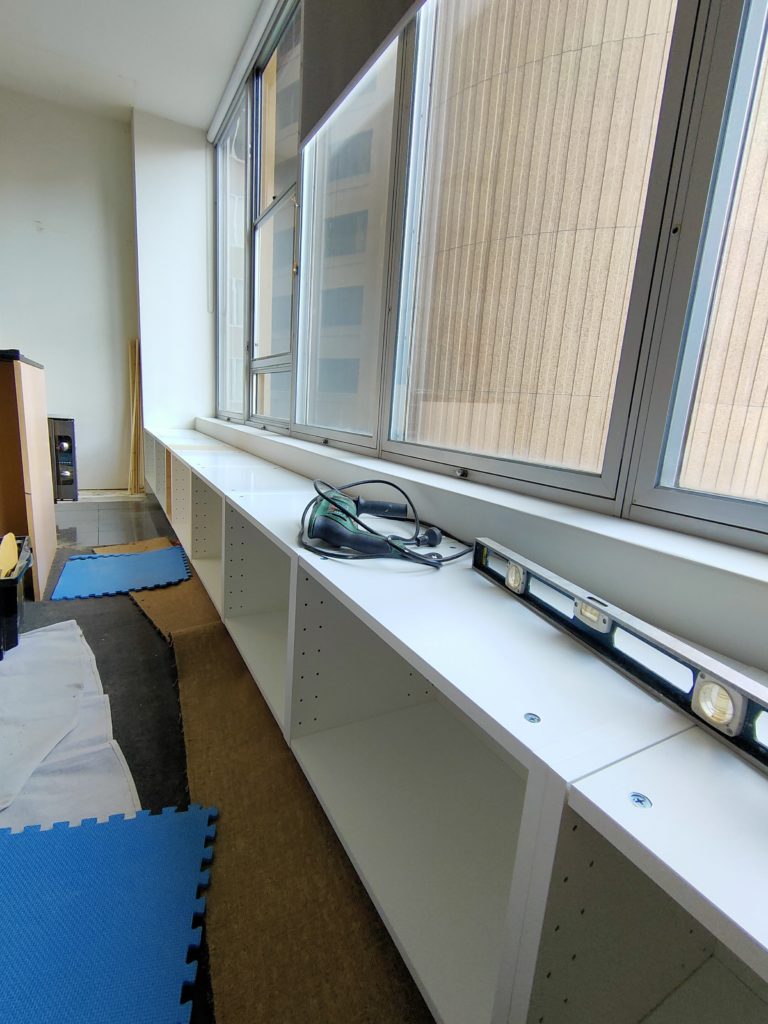
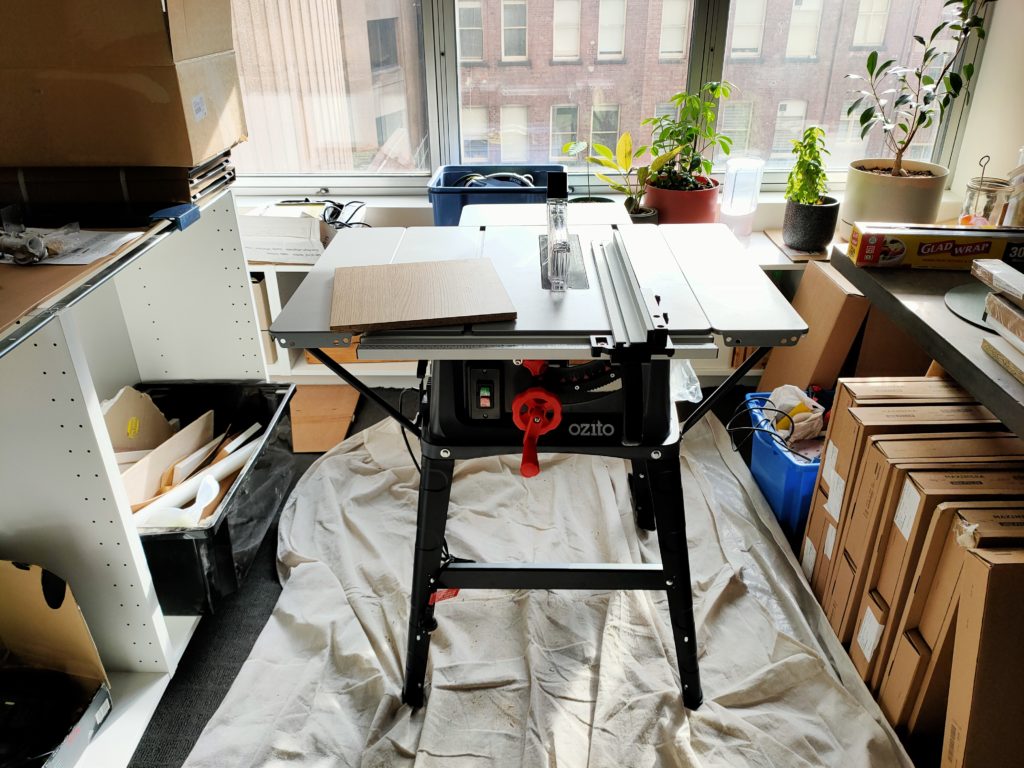
The hardest part for my husband was fitting out the kitchen where the cabinets don’t slide in. That little gap between the wall and the first row of cabinets, for example, or trying to fit a 900mm rangehood into an 800mm wall cabinet. We borrowed a few power tools to get some jobs done quicker and better, and ended buying one or two as well. Apparently cutting timber “straight” is a big deal and not that simple in the absence of a basic workbench. Apartment living is great until you need a tool shed.
The IKEA cabinets are standard sizes but their standard may not match your standard. You always end up needing to cut filler pieces to make things perfect. We even cut up a small cabinet to shrink it down to size, allowing us to insert a 4 meter long window bench snug between two concrete columns. I wanted more storage, and I got more storage.
Upgrades
While most of this project has been focused on keeping the budget low, we didn’t want to miss a chance to make an upgrade if spending a few dollars extra will give us something much better.
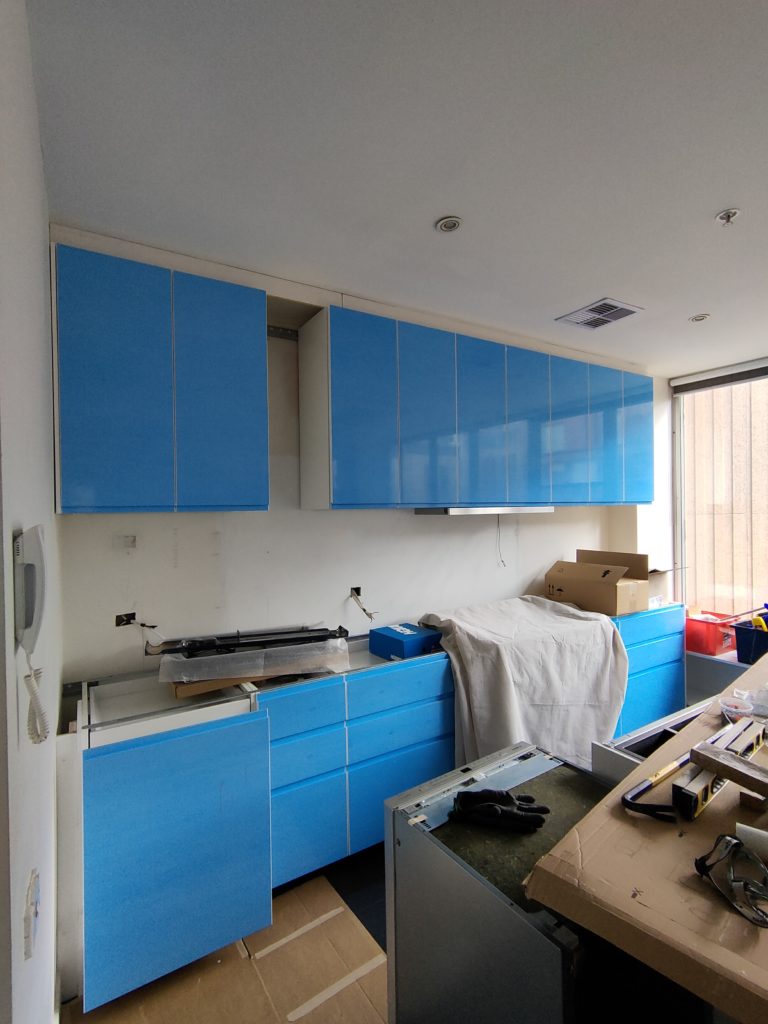
I had seen some upmarket doors that are sold to fit IKEA cabinetry. Although they looked lovely, this option would have also added 5-6 weeks for manufacture and required the additional cost of door handles. Our fist choice was Voxtorp doors from IKEA which are grooved so you don’t need handles at all, which also saved a considerable amount of money. We got a quote for the upmarket doors and it was almost as much as what we spent on the cabinets, and suddenly the Voxtorp looked that little bit more appealing.
The other big expense for a kitchen is the benchtop. Nobody has the slightest idea what a benchtop actually costs, but we all fear the worst!
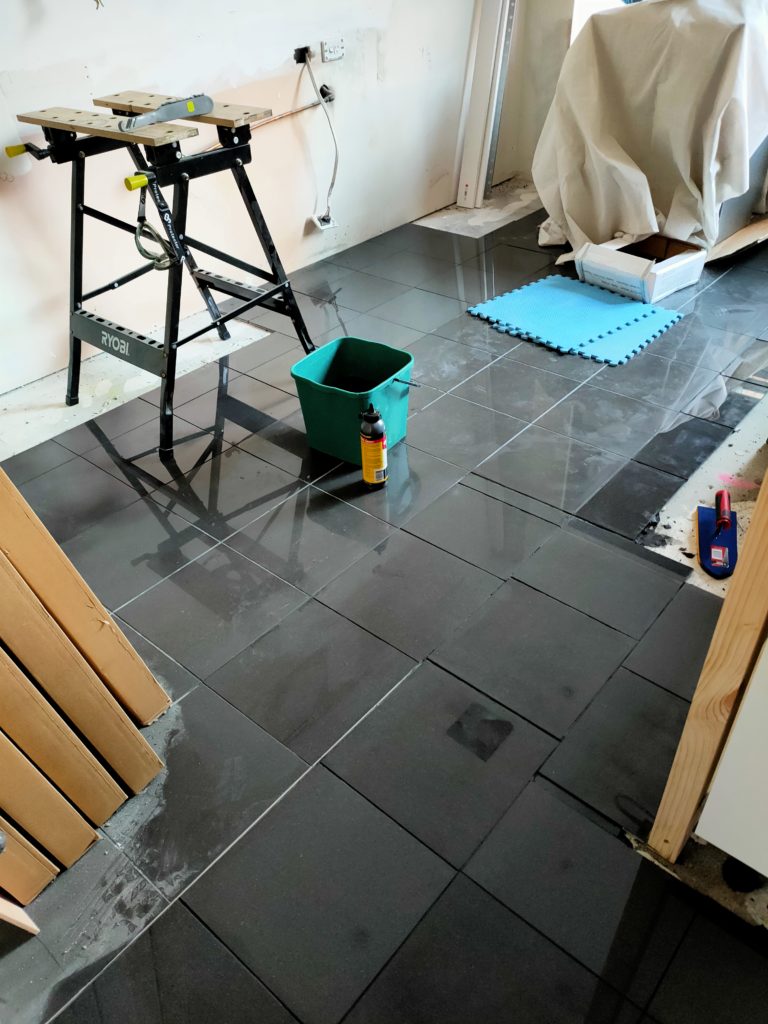
We looked at concrete options, both factory made and onsite. We’ve already seen how sanding a bit of plaster can fill the apartment with fine white dust, so the thought of concrete slabs getting ground down on-site did not fill us with joy. Also, we couldn’t be sure exactly what we would end up with. The next option was quartz benchtops (“engineered quartz” such as Caesarstone). These are generally very practical and some of the newer styles lean into the concrete vibe. We spent a day visiting supplier showrooms to get a feel for what we liked. The tiny little sample pieces tell you nothing; you need to see a really big slab of the stuff to get a sense for how it might work in your kitchen.
We found a few we liked, but there’s a homogeneity to quartz that renders the final result a little bland. Too much of same. Too perfect. Too smooth. There’s nothing wrong with quartz, and that’s kind of the problem. We had found a few porcelain suppliers in our research as well, and that when it all came together. These are “large format porcelain tiles” about the size of a car. Most are around 3.6m x 1.2m, and in the hands of a decent stonemason anything you can do with quartz you can do with porcelain. These are actual porcelain tiles, not resin baked engineered stone. They template the design on the surface and then bake that onto a porcelain biscuit.

Why Porcelain
The end result is properly non-porous, heat tolerant and gorgeous. We loved the textural feel of the porcelain, offering a range of finishes that step away from the perfect finish of polished quartz and offers something more relaxed and tactile. It was hard to chose which one we loved the most. So many great finishes and colours, but not all were a good match for our kitchen design. Some were simply too glamorous in fact. This kitchen is IKEA white with birch plywood trimmings, so we wanted to keep the benchtop style looking functional rather than magical.
What we ended up choosing was from Stone Ambassador, who sell the Vasari range in Australia. “Haze” is the name and it’s a lightly textured style that has a subtle concrete pattern and a very faint hint of ochre, instead of the typical cooler tones. We’d visited Stone Ambassador once already and they whisked us out the back to pull out a big slab of “Atlantis Smoke”. On our second trip the lighter and gentler “Haze” was the pick. We really appreciated the professional experience at their showroom. No fuss and just a great space to see if they have a benchtop that might suit your kitchen. Plus they put us in touch with a few good stonemasons to get actual quotes from.
In the next chapter we’ll go into more detail about the porcelain and our experience getting it installed, but for now let me highlight that the price of getting this magnificent material in your kitchen may only be a few hundred dollars more than quartz. There are certain things that make sense to spend a little extra money on when doing a kitchen, like getting qualified trades to handle the electricity and gas for example!
The other is getting the benchtops you really really love. For a fraction of the cost of upgrading the doors, we decided to upgrade the benchtops instead.


Jacky
Looks great. Looking forward to seeing the finished product.