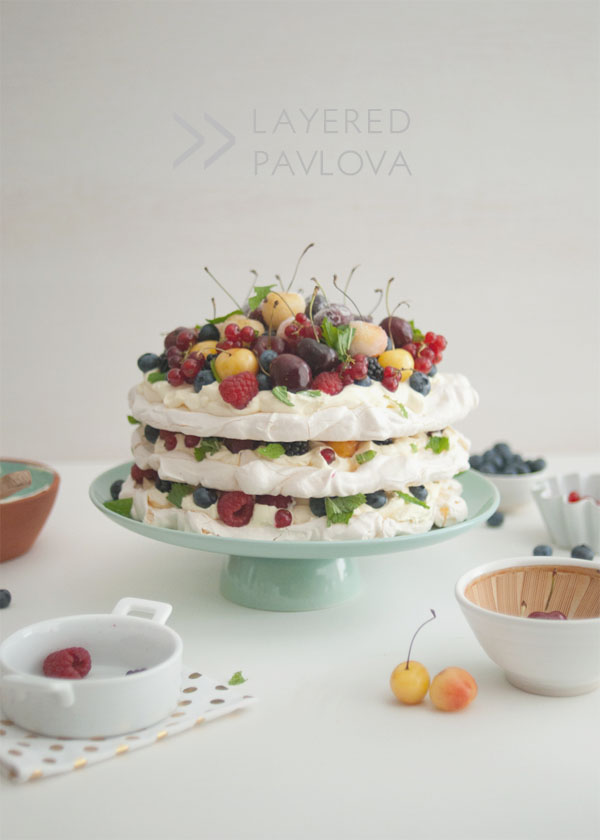
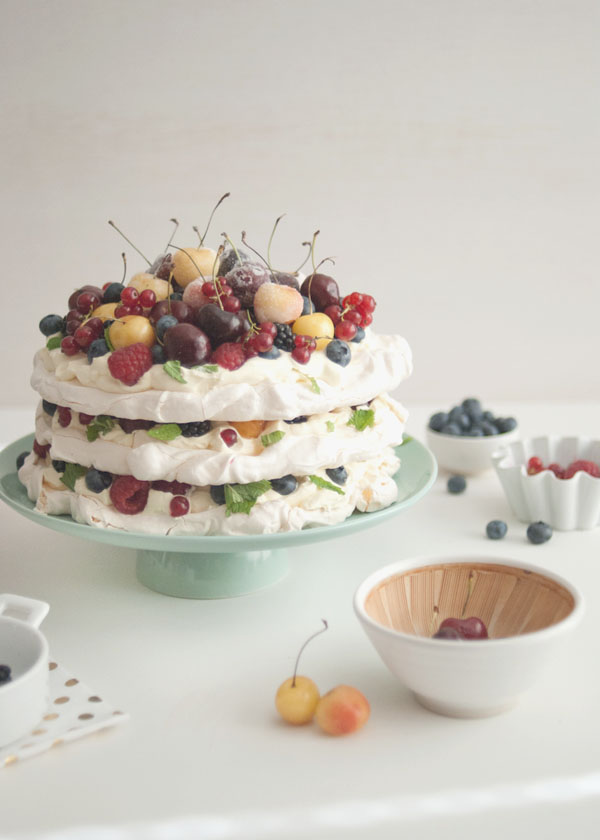
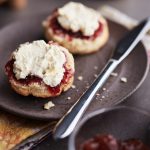
Layered Summer Berry Pavlova
Happy New Year to you all!
May 2014 be your best year on this large gassy planet that is hurling it’s way through space 🙂

Let’s start the year off with this triple decker pavlova that mated with a fruit shop.
I made a double decker version for Christmas Day, and it was well received by everyone. Sure it didn’t beat my Santa pavlova from 2012 in terms of appearance (which I still need to blog), but it was the perfect way to end possibly our most pleasant Christmas ever.
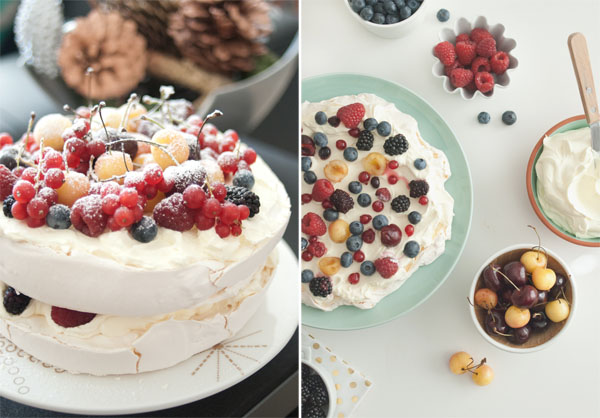
I had liked the look of the double decker pavlova, and I had used a different recipe to the one I previously blogged, and found this one to be more stable. With plenty of eggs still in my fridge, I decided to try overachieve with a triple decker one, with the inclusion of my new obsession; fresh mint. Trust me on this one, the fresh mint is awesome, and Thanh who was sitting next to me when we ate it, remarked how much he liked the fresh mint. It just really works well with the berries, cream and meringue.
I made this for a belated Christmas celebration with my flogging family; Thanh, Ms I-Hua & The Boy, Agnes & Al, Kat & family, graciously hosted by April & the Foodtrail family. She even got out her best silverware for us 😉
I hadn’t shared a photo with the gang before hand so when I pulled it out of the fridge when dessert o’clock hit, there was a lot of “oooooo!” and “ahhhhh!” and “that is the prettiest pavlova ever!”. There may also have been a “this is going to get sooo many likes on instragram” said by king of instagram; Toddy 😛
I felt all warm and fuzzy inside at this point. Then April’s hubby Laik turned to me and said “That’s a really good pavlova, I don’t normally like pavlova, but that’s a really good pavlova”. In fact, he actually said that a few times, to everyone around the table 😛 … so yeah, it’s a good recipe!
Double or triple decker, either way. Just make sure you load up the layers in between with their fair share of fruit, and definitely trust me with the fresh mint.
Layered Summer Berry Pavlova
Print RecipeIngredients
- 6 large free-range egg whites
- 300 g caster sugar
- 1 pinch sea salt
- 600 ml thickened cream
- 2 tablespoons caster sugar
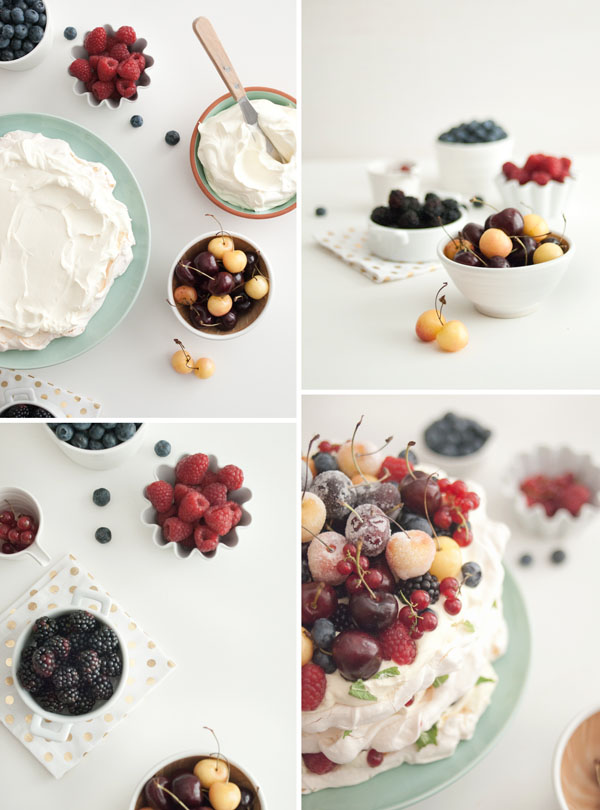
- A selection of berries and cherries
- 3 sprigs fresh mint
Instructions
- Preheat the oven to 130°C fan-forced. Put your egg whites into a clean bowl and whisk them at a medium speed until they start to form nice firm peaks.
- With your mixer still running, gradually add the sugar and a pinch of salt. Turn the mixer up to the highest setting and whisk for 7-8 minutes more until the meringue is white, glossy and smooth. If it feels grainy, whisk for a little bit longer, being careful not to let the meringue collapse.
- Line three baking trays with baking paper. Divide the meringue mixture evenly between them and shape each blob into a circle about 20cm in diameter.
- Put all trays into the oven and bake for 15 minutes. Rotate the top and bottom trays and bake for another 15 minutes. Rotate the top and bottom trays once more and bake for a further 10 minutes until the meringues look slightly golden and are fluffy in the middle.
- Whip the cream with the sugar until it forms soft peaks. Spoon a third of the cream mixture on top of one of the meringue and smooth it out. Sprinkle a third of your berries evenly around the cream mixture and top with some torn mint leaves. Place the other meringue on top and press down gently to stick them together. Spread a third of the cream mixture on top and sprinkle with a third of the berries and a little more torn mint leaves. Place the final meringue on top, pressing down lightly to gently stick them together. Spread the remaining cream mixture over the top layer and sprinkle the remaining berries on top. Scatter over a few small mint leaves and enjoy!
Notes
Dip the cherries in the frothed egg white mixture and shake excess off. Roll in caster sugar. When dry, you can coat again in caster sugar if required. Adapted from Jamie Oliver


Thanh
Loved this pavlova. Very delicious. I must pimp up my pav next time too.
GourmetGetaways
Wow!
Now that’s how to make a pavlova!!!
Happy New Year to you Shellie!
Tina @ bitemeshowme
such a simple pav recipe! i gotta try it, though my oven will never fit 3 trays to make this – i know what a tragedy. HAPPY NEW YAER SHELLIEEEEEEEEE! Looking forward to what your kitchen will bring for us this year 😀
Esz
Ok so I am def making this! I used NQN’s mini pav recipe for the pavs I’ve made and found that to be dead easy. Shall try this one too. You cant beat a pav for being minimal effort and showstopping results. The white is a blank canvas for colourful fruit.
Really love the mint idea too. Its one of those ‘of COURSE! Why didnt *I* think of that” things 😉
Happy new year and I cant wait to see what you post throughout 2014 😀
Lorraine @ Not Quite Nigella
Thanks Esz! I’m so glad that you like the recipe! xxx
Lorraine @ Not Quite Nigella
Absolutely gorgeous pav Shellie! I saw it on twitter and thought that it was so pretty! 😀
msihua
So superbly pretty, beautiful and amazing and tasted soooooooo good!!!
Joanne T Ferguson
G’day Happy New year Shellie! Your photo looks GORGEOUS, true!
I have to admit, I have never made a pav, but your photo inspired me to do!
Cheers! Joanne
Kristy @ Southern In-Law
This looks so good!! Shellie, can I have a pocket sized version of you to make my food look pretty? 😉
Maureen | Orgasmic Chef
What a glorious dessert, Shellie. I. want. some. (okay, honestly, I’d like it all) 🙂
Happy New Year!
Melanie
Shellie – you never cease to impress – the whole post is just lovely, clean and beautiful, and I’m having some serious prop envy! Definitely trying the mint idea – I use it with berries by themselves but as a garnish and a hit of flavour with the sweetness of the meringue, it makes a great idea even better – here’s to 2014!
Sarah
Beautiful pav, Shellie!! I love all the different colours of the fruits against the white cream and meringue.
Happy new year! 🙂
Michelle @ The Bakeanista
This is the most beautiful pav I’ve ever seen!!! Not usually a fan of pav but tempted to make. And I’ve got exactly 6 egg whites sitting in my fridge. I think I know what I’m making next.
Nic@diningwithastud.com
Stunning. Just stunning!!! Happy New Year lovely 🙂
Marta @ What should I eat for breakfast today
I’ll have to wait till summer with this recipe. But I’ll make it one day. I just need all the fruits 🙂
Daisy@Nevertoosweet
SOOOOOOOOO pwetty your pav with LOADS of fruit and not just cream hahahahaha a naked pav like we know 😛
Ricky is still bugging me about making him one…..will do it soon I guess since he bought me 1.5 dozen of eggs again lol
Agnes
Surely that’s not you overachieving, that’s you being normal.
(And it was the prettiest pavlova ever!)
Debs @ Wilde Orchard
I love this pavlova, Shellie! It’s absolutely stunning! Gorgeous photography and styling!